Navigation on Ben Nevis Summit
Navigating on Ben Nevis summit on a clear summer day with good visibility is a relatively straightforward affair. Typically there is a steady stream of other walkers all following the Mountain Track to the summit and those who have already summited will be heading back down in various sized groups, all easily able to follow the path.
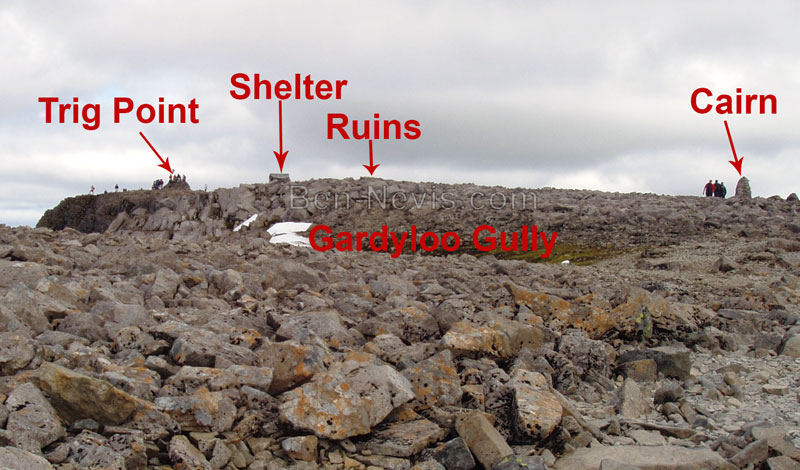
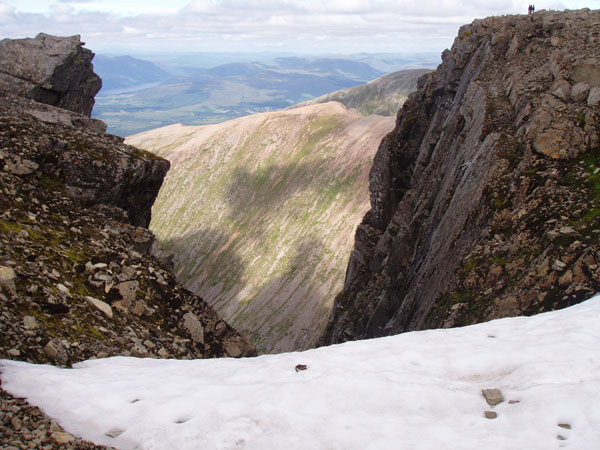
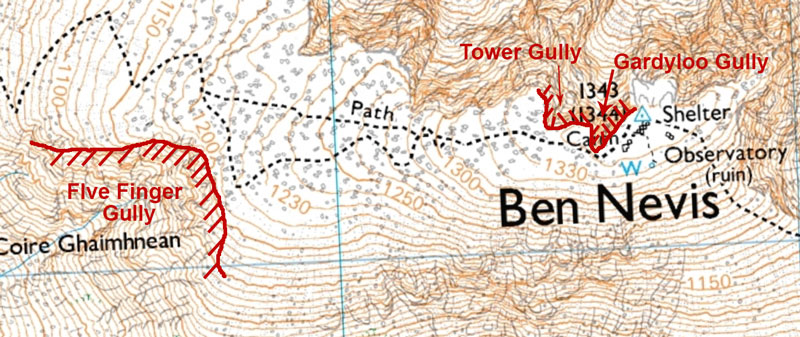
The ruins of the observatory and hotel are clearly visible as are, importantly, the various gullies of the North Face, including Gardyloo Gully.
Under those weather conditions many will wonder why the fuss about navigation on The Ben.
However!
Clear days with good visibility throughout on Ben Nevis don't come around that often. Some estimates give those types of condition as only appearing on Ben Nevis for 14 days of the year in total so if you are fortunate enough to experience such good weather count your blessings and take lots of pictures! This shouldn't put you off, however, as breaks in the cloud can give a drama to the landscape that is unparalleled. You may even be fortunate enough to encounter one of the regular, if infrequent, temperature inversions.

Typical Weather and Navigating To The Summit
Even on the best of days at sea level Ben Nevis can be shrouded in cloud which means walking and navigating in hill fog. Hill fog can also roll in at any time and even on initially clear days the cloud base can drop from high above the summit to blanketing the upper slopes in minutes.
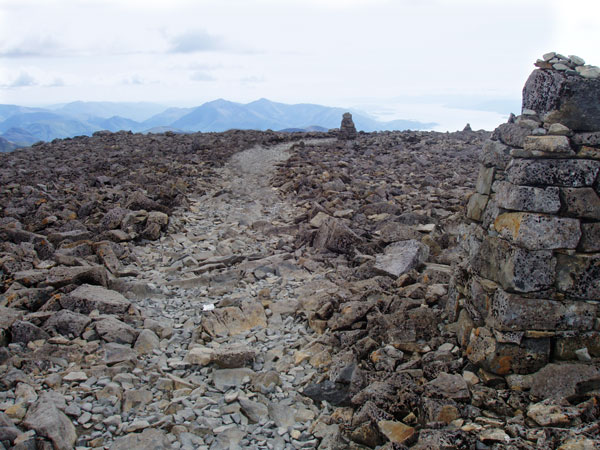
If the route is clear of snow (and that can sometimes take until July / Aug) then navigating to the top in hill fog by following the Mountain Track is relatively straightforward until you pass the last of the line of relatively recently added navigation cairns, just after MacLean's Steep (the last of the upper zig-zags), where the path kind of fizzles out thanks to the slightly larger boulders and harder rock underfoot. Hopefully the cairns aren't buried if you are walking under snow conditions. If you have reached the last of these cairns you should be just past Gardyloo Gully.

When it's clear you can easily see the summit cairn and emergency shelter at this point but in hill fog these are unlikely to be visible. Which is when you have to be aware that there are sheer drops on the left hand side (North Face) as you head towards the summit.
If you have reached the last of the cairns after MacLean's Steep then following a rough bearing of 75° from that cairn for approx. 75m should have you at the ruins of the old observatory. Note: following a bearing of 75° from one of the previous cairns will see you walk off the North Face so make certain you have the correct one!
Navigating Down From The Summit
In bad weather navigating down from the summit of Ben Nevis can be a tricky business. Too far to the right coming from the summit cairn / trig point and you risk going over the North Face cliffs or dropping into one of the gullies. Add snow cornices into the mix and the unwary can find themselves in life-threatening danger. Veer too far left on the way down and you can find yourself plummeting to your doom down Five Finger Gully (a known avalanche danger point).
This is where map and compass navigation come in.
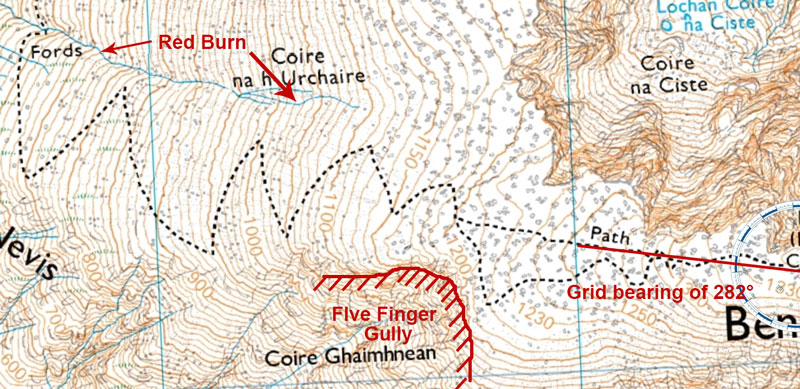
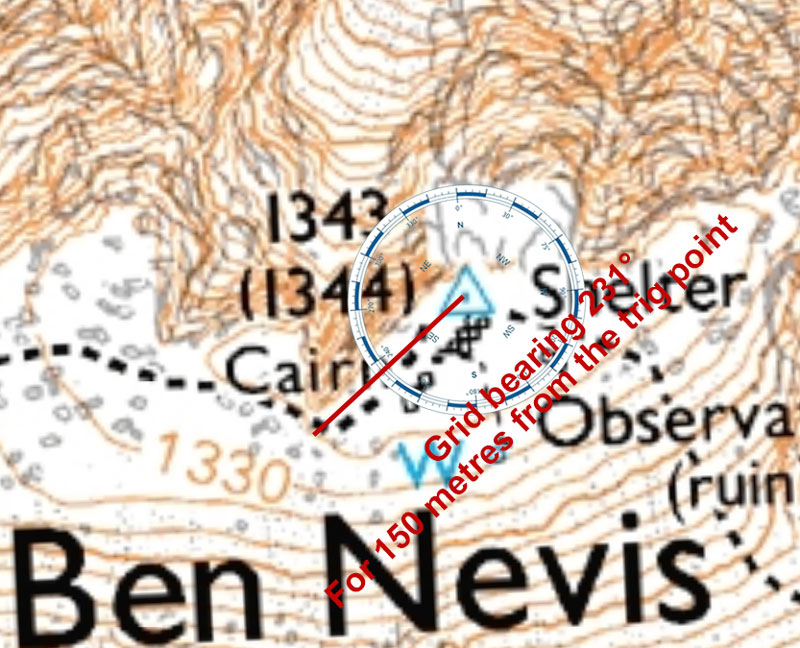
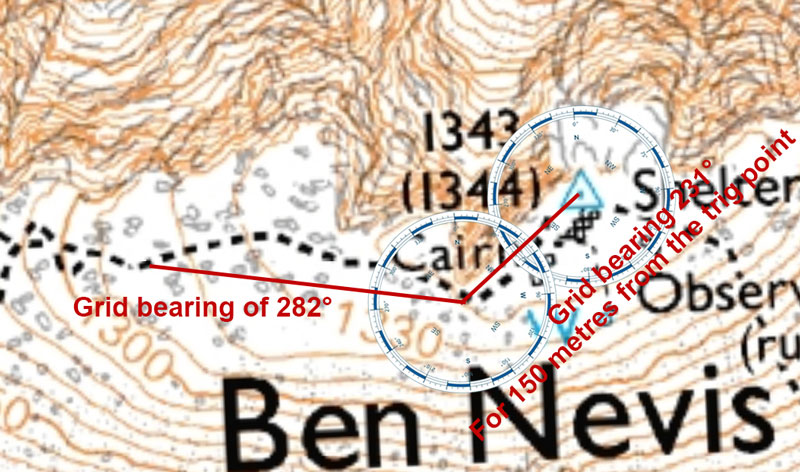
To navigate down from the summit in poor conditions you must take a grid bearing of 231° from the trig point located on top of the summit cairn near the emergency shelter, and follow it for a distance of 150 metres. This will take you safely to just beyond Gardyloo Gully.
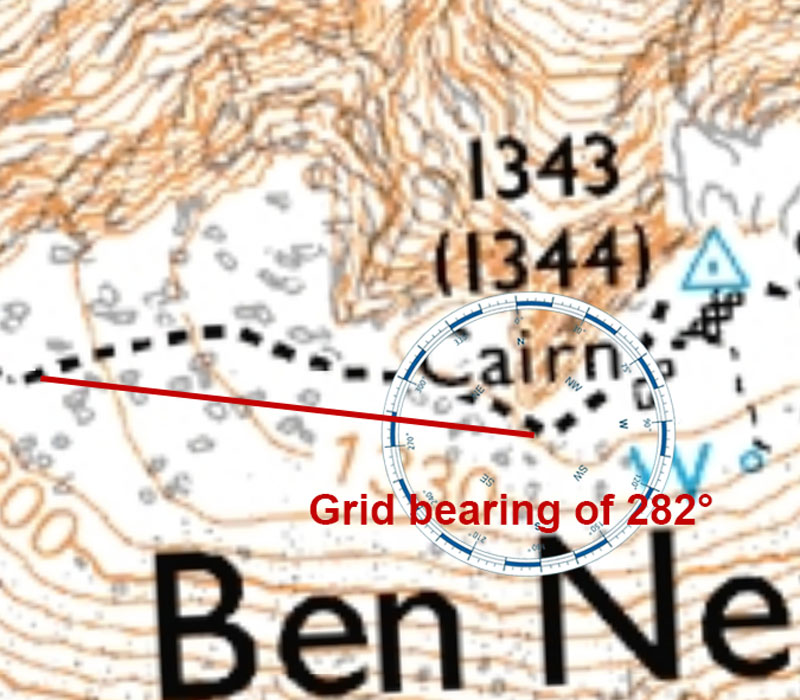
From there you must then take a grid bearing of 282°. This will put you on target to hit the Mountain Track avoiding drifting into Five Finger Gully, a deceptively inviting gully that has a relatively gentle slope initially.
Of course you are not out of the woods yet! You must also be careful not to drift towards Red Burn on your way down, another known avalanche danger area. The Mountain Track crosses Red Burn further down the slope so great care must be taken if it is in spate.